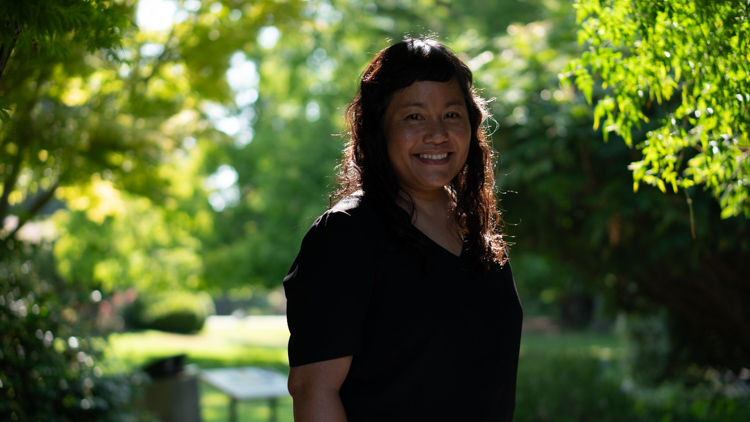
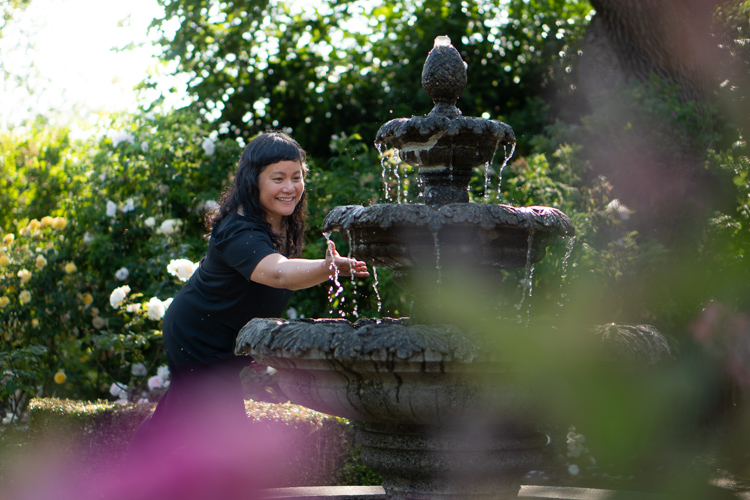
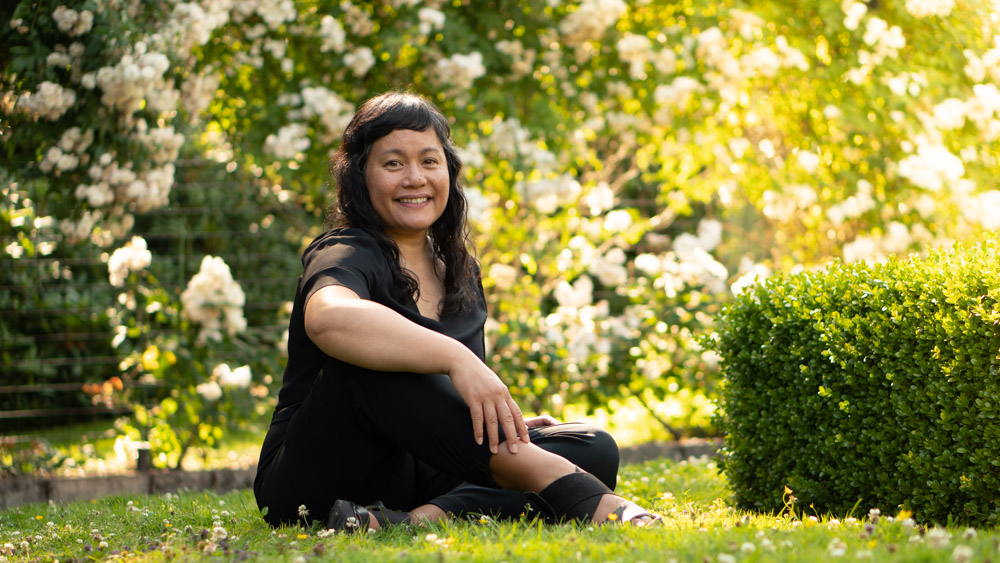
Create professional-looking “golden hour” portraits without a flash
Intro
I have recently entered the world of freelancing, offering videography and other creative services. Last month, I was offered a professional family portrait shoot through a friend.
I didn’t know a lot about portrait photography to be honest. I mean, I understand how to control my mirrorless camera because of the video work I’ve done. But …portraits? How do I pose my subjects? How do I mimic that popular golden hour look I’ve been seeing on Instagram? How do I light it perfectly?
Well, after many hours watching YouTube videos, a test shoot on location and experimenting with editing software, I am happy to share some simple steps I learned — to go from good to great with your outdoor portraits.
What equipment do I need?
To get the most from this advice you’ll need a DSLR camera with a 75mm or 50mm lens, with an f-stop of f2.8 or less. If not, an iPhone with “portrait” camera setting can do the trick in a pinch.
I use a Sony Alpha 6500 with a 50mm lens (which is equivalent to 75mm with its crop sensor.) Its lowest f-stop is f1.8. The autofocus on this camera is pretty incredible.
You’ll also need Adobe Lightroom Classic on your computer. A free version of the app is also available for iPhone, iPad and Android. I choose to use Lightroom Classic as I am familiar with the workflow and like to edit on my desktop. Lightroom Creative Cloud (CC) enables you to edit/access across multiple devices and operating systems.
What should I understand first?
It helps to understand your camera’s manual settings. The way to get that soft background behind your subjects is a low f-stop, for example f1.8. This is called “depth of field.”
Make sure you understand your camera’s autofocus settings. If you have face detection, turn it on.
You should have a good working knowledge of Lightroom Classic; however I will walk you through most of the steps.
What’s the best time of day / year?
The ideal day will have full sun (yes I know people have told you that a bright cloudy day is great for photos — and it can be — but not for this exercise)
Ideal time of year is late spring through to early fall, since foliage greatly enhances these shots.
The best time of day is 1-2 hours before sunset (true “golden hour.”) If that’s not possible, the later the better. The worst time is when the sun is directly overhead as it causes harsh shadows under your subject’s eyes.
Step one
Select camera settings
- Camera RAW (this format allows you great flexibility in editing without damaging the image)
- Set your camera to M (manual) mode
- Attach your 50 mm lens (equivalent to 75mm full frame), or if you have a zoom, set it to 50mm – 75mm.
- Set f-stop (aperture) to f1.8 (this low f-stop / “shallow depth of field” creates a blurry background and makes your subject “pop.”)
- Set ISO to 100
- Auto white balance is fine, or you can choose shade / full sun.
Step two
Location and lighting
- Find locations which have the sun behind the subject, ideally shining through leaves from a tree.
- Position your subject so the sun is behind their head and rims their hair. A neat trick to ensure their head is always framed by the sun is to look at their shadow. If their head’s shadow is in a sun blob, you’re good. You can get fun participation from the subjects by just saying “sun blob!” and they’ll find it themselves.
- Adjust shutter speed to expose for the background. The subject will be underexposed. This is okay, since we are going to fix this later in Lightroom.
- The photo below was taken with these settings: f2, 1/500, ISO 100

Step three
Posing your subjects
- Ensure all subjects are on the same horizontal plane. Have them line their toes up. If you forget this step, some subjects may be out of focus. This is because you are using a low f-stop / shallow depth of field.
- Ensure they’re not right up against a background like a hedge — you need space between them and the background.
- Use angles for visual interest – i.e. vanishing lines and perspective rather than straight on.
-
- For family shoots, here are some fun poses:
- Hold hands and walk slowly towards the camera
- Tickle fight if there are kids present (young and young at heart alike!)
- Sitting on the ground comfortably – ask the model to settle down as if they’re about to read a book.
- For family shoots, here are some fun poses:
Step four
Use foreground elements
- Add visual interest by shooting through/around leaves or flowers, which will appear as colourful blurry blobs.
- You could also break off a small leafed branch and hold it in front of the lens
- Other objects such as trees, people, bike racks etc., can be used as well — the only limit is your imagination.
- Sometimes your camera will focus on the foreground elements – this can be avoided usually by holding down the shutter halfway while pointed at the subject, then reframing the shot before pressing the shutter fully.

Step five
Edit in Lightroom Classic
- Open Lightroom and import RAW photos
- Select your favourite shot
- Correct the overall exposure
- Crop and straighten the image
- Open mask palette and choose “select subject”
- Adjust exposure and temperature on the subject
- Adjust temperature slider on both the main photo and the masked subject to warm it up to your liking (about 6,000 – 16,000)
- Add a radial or gradient mask to the sky, mimicking where the sun is originating
- Using the “tint” slider, warm it up & increase exposure until it mimics the sun
- Sometimes I add a reverse vignette (dark corners) to focus attention to the centre subjects
- Export file with specs as required.
- Congratulations! You now have a professional looking photo to share with your loved ones.
Bonus tips
Location scout first
- It might seem like overkill, but it pays to be prepared. A day or two before the shoot, take your camera to the pre-selected location. If you get to choose the location, select a park or natural setting with a lot of foliage. You’ll want flowers or grasses and large trees. Best seasons are late spring, summer or early fall.
- Take a model with you for the test shots. Most friends are thrilled to get a free portrait shoot to use in their LinkedIn profile or other social media.
- Go at the same time of day as the shoot. This is important because you need to know where the sun will be shining and at what angle.
- Using your model, select 3-4 locations which have:
- interesting foreground foliage
- interesting background foliage
- an interesting composition
- dappled shadows
- By pre-selecting locations, you will be confident and prepared.
- You could scout out some locations in your region now, so you can quickly and confidently direct a last minute shoot.

